How to Install a Fire Pipe Wrap
October 25, 2024

Wall or floor structures that have been penetrated by pipes are vulnerable when it comes to fire and smoke spreading throughout a building. Using a Pipe Wrap will reinstate the wall’s integrity by containing fire to its area of origin for up to four hours.


Under fire conditions, the intumescent material within the wrap expands inwards against the structure and fills the void left by the burnt-out pipe.


They are simple to fit and require no maintenance, making them a quick and easy fire protection solution.

In this blog post, we’ll take a closer look at what intumescent fire pipe wraps are, why they are important, and how to install them in different situations.


What Is a Fire Pipe Wrap?


Pipe wraps can be added to pipes within walls or floors so that when activated by extreme heat the intumescent material expands and crushes the pipe to stop the spread of fire and smoke travelling through into an adjacent compartment. 

Intumescent pipe wraps offer a simple and more economical alternative to intumescent pipe collars for fire-stopping plastic pipework and electrical trunking.


Pipe collars may be a more suitable solution for your project, and we can assist with that decision.


How Does a Fire Pipe Wrap Work and Why Are They Important?


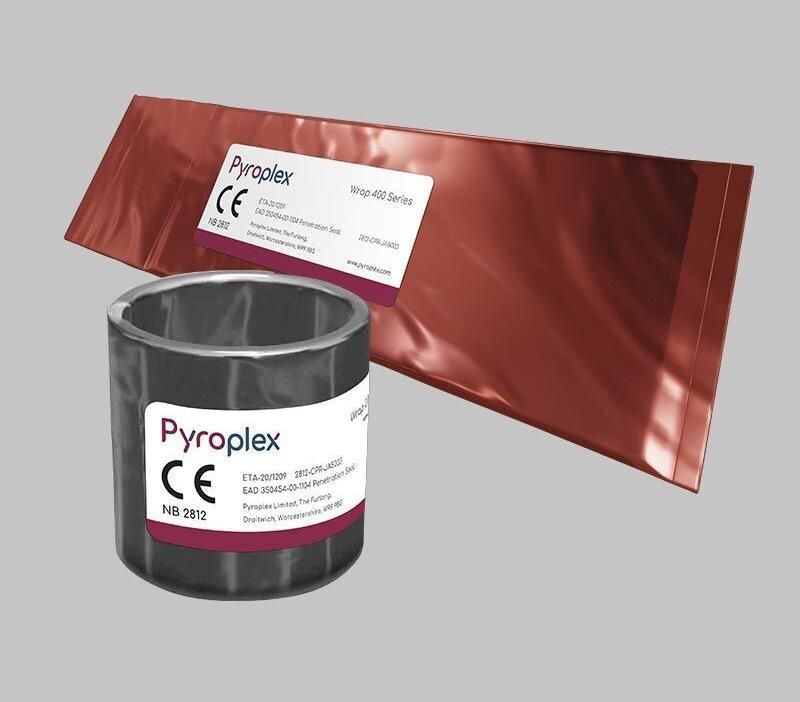
Pipe Wraps comprise layers of a graphite-based intumescent sheet encapsulated in a polythene cover. The cover sleeve is an integral part of the system and should not be removed.


The product is designed to be wrapped around the outside diameter of the pipework or trunking and is secured by a self-adhesive strip.


The Intumescent Pipe Wrap is then positioned within the compartment wall or floor so that the edge of the product is left exposed at the face of the wall or soffit.


Benefits of using a pipe wrap: 


  • Simple to install
  • Water resistant
  • No mechanical fixings
  • Maintenance free
  • Affordable
  • Not visible 


Fire stopping is a fundamental part of passive fire protection and should never be overlooked. Without adequate fire stopping materials such as pipe wraps, smoke and flames can quickly travel throughout a building, damaging property and risking the lives of its occupants.


How to Install Fire Pipe Wrap


Installation in Masonry Walls 


  • Check that the pipe surface is clear of mortar, dust or any other contaminants.


  • Ensure that the correct Pipe Wrap is installed to suit the diameter of pipe and fire rating.


  • Wrap around the pipe and fix with integral self-adhesive strip.


  • Slide the Pipe Wrap into the wall, ensuring that the outermost edge of the wrap aligns with the face of the block work. Important: If this is not carried out, the intumescent material will be insulated and shall lead to a product malfunction.


  • Repeat on the other side of the wall if necessary.


  • Make good around Pipe Wrap with either Firestop Compound or traditional mortar to the full depth of the seal.


For walls it may be necessary to fit two wraps depending on the fire risk areas concerned and if the wall thickness exceeds 150mm.


Installation in Floors


  • Check that the pipe surface is clear of mortar, dust or any other contaminants.


  • Ensure that the correct Pipe Wrap is installed to suit the diameter of pipe and fire rating.


  • Wrap around the pipe and fix with integral self-adhesive strip.


  • Slide the Pipe Wrap on top of the shuttering being used for the making good. Ensure that the bottom edge of the wrap will be exposed in the floor slab when the shuttering is removed.


  • Important: If you are using permanent mineral wool shuttering for Firestop Compound, cut out the shuttering to ensure that the bottom edge of the Pipe Wrap can be viewed from the soffit below. If this is not carried out the intumescent material will be insulated and shall lead to a product malfunction.


  • Seal the Pipe Wrap into the structure with Firestop Compound or concrete, ensuring that there is a minimum of 25mm cover over the top of the Pipe Wrap.


At Blazeout, we stock a range of pipe wraps in a variety of sizes or a continuous wrap – from a range of manufacturers.


As experts in passive fire protection, our team is available if you need any help or advice with your fire stopping project or whether pipe wraps could be a solution for you. Contact our technical team at sales@blazeout.co.uk or 01202 155780 and they will be happy to assist you with any questions or queries.

September 15, 2026
Simplify project procurement with Blazeout. Source firestopping, fire door products, fixings, site essentials and access solutions from one supplier.
August 24, 2026
When designing firestopping around service penetrations, the distances between individual services and nearby openings is an important part of the overall system design. Pipework, cables, conduits and other penetrations need to be installed within the spacing parameters covered by the relevent tested configuration. Changing those distances can influence how the firestop behaves when exposed to fire. If the specified spacing is not maintained, there may be a greater risk of: - Reduced fire-resistance performance - Earlier-than-expected system failure - Increased smoke passage -Excessive heat transfer to surrounding services or firestopping materials Firestop systems are tested in defined configurations, meaning that the test evidence applies to specific installation arrangements, including the seperation between penetrations. For this reason, seperation requirements should be addressed during the design and coordination stages. Establishing the correct spacing before installation helps ensure the completed penetration matches the configuration for which the firestopping system has been assessed. As the specialist single source distributor of firestopping materials, Blazeout are uniquely positioned to assist with your projects, supplying the correct solutions in full and on time.
August 24, 2026
When a door fails to close properly, closes too quickly or slams shut, the door closer is often the first component to be blamed. However, while a door closer is designed to provide reliable and controlled closing, its performance depends heavily on the door, frame and surrounding installation working correctly. Door closers play an important role in security, fire safety, noise reduction and preventing damage. But when a door does not swing, close and latch freely on its own, even the best-specified closer may struggle to perform as intended. Before adjusting or replacing the closer, it is worth checking some of the more common causes of poor door operation. Poor Joinery and Installation One of the most common reasons for a door failing to close correctly is poor installation or inaccurate joinery. If the door frame is not plumb, for example, the door may meet the frame at the top but leave a gap at the bottom. A door closer cannot always overcome this type of misalignment. Installation can be particularly challenging in older buildings, where walls and floors may not be perfectly straight. However, similar issues can also occur in new-build properties, so accurate measurement and checking are essential in every installation. Floor levels and threshold gaps also need careful consideration. Variations in floor levels can affect how a door is trimmed and fitted, potentially preventing it from closing freely. At the same time, installers must ensure that any relevant requirements for cold smoke control and threshold gaps are maintained. Even seemingly minor issues, such as an incorrectly fitted or badly trimmed entrance mat, can interfere with the door’s closing action. The key is careful preparation: measure accurately, make the necessary adjustments and always check the door’s operation before considering the door closer. Getting the Door Gaps Right Insufficient clearance between the door and frame is another common cause of closing problems. Where a door is too tightly fitted, it can bind against the frame, creating resistance that prevents it from closing and latching correctly. For fire doors, appropriate gaps are particularly important. The guidance and requirements applicable to the door assembly should always be considered, along with the door manufacturer’s and hardware manufacturer’s instructions. Smoke seals also need to be considered during the installation process. If seals are added without sufficient space or are fitted incorrectly, they can create additional resistance and cause the door to stick before it has fully closed and latched. Using the correct product and following the manufacturer’s recommendations can help avoid these issues. Ironmongery and Other Accessories The door closer is not the only piece of hardware that can affect how a door operates. Locks, latches, keeps and other ironmongery can all contribute to closing problems if they are poorly specified, incorrectly adjusted or badly fitted. For example, some external doors use locks designed to latch automatically when the door is pushed shut. If the locking mechanism is incorrectly adjusted, it may prevent the door from closing or latching as intended. Similarly, a poorly positioned keep plate can obstruct the latch or stop the door from closing fully. When investigating a problem, it is important to consider the entire door assembly rather than focusing on the closer alone. The Effect of Air Pressure Air pressure within a building can also have a significant impact on the performance of a self-closing door. A door and its hardware may be correctly specified and installed, but excessive positive or negative air pressure can prevent the door from closing and latching reliably. In some circumstances, air pressure can also cause doors to swing or close with excessive force. This can be particularly challenging in taller buildings, where changes in pressure and air movement can create unpredictable conditions. Although building design can help minimise the impact of air pressure, it is not always possible to predict every condition. In many cases, a correctly specified door closer can be adjusted to accommodate the environment. Small adjustments can make a significant difference, so changes should be made gradually and the door tested after each adjustment. The Little-Finger Test A simple way to assess whether a door is functioning correctly before blaming the door closer is the “little-finger test”. A well-installed door should be able to swing closed, close fully and latch with very little resistance. If a gentle push from a little finger is enough to close the door, a correctly specified and adjusted door closer should be able to operate it reliably and in a controlled manner. If the door is difficult to close manually, increasing the power of the door closer may not solve the underlying problem. Conclusion Door closers are often blamed when a door fails to close correctly, but the cause is frequently found elsewhere. The frame may be out of alignment, the gaps may be too tight, the threshold may be obstructed, or another item of ironmongery may be preventing the door from closing and latching properly. Before adjusting or replacing a door closer, it is worth checking the fundamentals: the frame, the door gaps, the threshold, the latch and the overall operation of the door itself . A door closer can only perform as well as the door it is fitted to. Get the installation right first, and the closer is far more likely to do exactly what it was designed to do—close the door reliably and with controlled force.